Call Us: +91-7042640351, 9891868324
How to Enable or Disable Touchpad in Lenovo Laptop
By Admin / 03 Apr 2024
Welcome to our in-depth guide on how to enable the Touchpad on Lenovo laptops. Whether you're an experienced user trying to get the most out of your laptop or a beginner wanting to use it more effectively, this guide is meant to provide clear, concise instructions. How to enable Touchpad in Lenovo laptop underscores our commitment to helping you gain control over your touchpad settings. Following our instructions, you can seamlessly enable your touchpad, enhancing your overall user experience on your Lenovo laptop. Let's dive deeper into this and empower you with the needed knowledge!
Understanding the Touchpad Functionality on Lenovo Laptops
A touchpad, or trackpad, is a built-in input device on laptops that allows users to move the cursor and perform various actions by touching and swiping their fingers on its surface. It is an alternative to an external mouse, offering a compact and integrated solution for navigating the laptop's screen.
Reasons to Enable or Disable the Touchpad
Personal Preference: Some users prefer using an external mouse for precise control and find the touchpad distracting. Turning the touchpad on or off allows users to choose their preferred input Steps.
Gaming or Productivity: Gamers often disable the touchpad to prevent accidental touches during gameplay, ensuring uninterrupted and smooth performance. Similarly,
professionals engaged in tasks that require precision, such as graphic design or video editing, may prefer using a mouse and disabling the touchpad.
Battery Conservation: Disabling the Touchpad when not in use can help conserve battery life, especially for laptops running on battery power.
Steps 1: Using Keyboard Shortcuts
Lenovo laptops often come equipped with keyboard shortcuts that allow you to toggle the touchpad on and off easily. Here's how you can do it:
1. Enable touchpad:
- Look for the "Fn" key on your keyboard. It is usually located next to the "Ctrl" key.
- Press and hold the "Fn" key.
- While holding "Fn," locate the key with the touchpad icon. This key is often one of the function keys (F1-F12) and is usually labelled with a touchpad symbol.
- Press the touchpad key while holding "Fn." This Action should enable your touchpad.
2. Disable Touchpad:
- Follow the same steps as above, but press the touchpad key while holding "Fn" to disable the touchpad.
Using keyboard shortcuts is a quick and convenient way to toggle the touchpad's status without navigating system settings.
Steps 2: Using Windows Settings
If you prefer a more comprehensive approach or the keyboard shortcuts don't work, you can use Windows settings to manage the touchpad. Here's how:
1. Open Settings:
- Click on the Start menu and select "Settings" (the gear icon).
- Alternatively, press "Windows + I" to directly open Settings.
2. Navigate to Devices:
- In the Settings window, click on "Devices."
3. Select Touchpad Settings:
- On the left sidebar, select "Touchpad."
4. Enable or Disable Touchpad:
- Under the Touchpad settings, you'll find an option to toggle the touchpad on or off.
- Click on the toggle switch to enable or disable the touchpad according to your preference.
Steps 3: Using Lenovo Vantage
Lenovo Vantage is a utility software that comes pre-installed on Lenovo laptops and offers various system management features. You can also use it to enable or disable the touchpad. Here's how:
1. Open Lenovo Vantage:
- Click on the Start menu and search for "Lenovo Vantage."
- Open the Lenovo Vantage app from the search results.
2. Navigate to Hardware Settings:
- In Lenovo Vantage, go to the "Hardware Settings" tab.
3. Select Input:
- Under Hardware Settings, select "Input."
4. Enable or Disable Touchpad:
- Look for the Touchpad section.
- Toggle the switch to enable or disable the touchpad, as you prefer.
Steps 4: Using Device Manager
If you prefer a more direct Steps and have some technical knowledge, you can also use Device Manager to enable or disable the touchpad. Here's how:
1. Open Device Manager:
- Right-click the Start button and select "Device Manager" from the context menu.
2. Locate the Touchpad Driver:
- In Device Manager, expand the "Mice and other pointing devices" category.
- Look for the touchpad driver. It is often labelled with the brand name of your touchpad, such as "Synaptics" or "Elan."
3. Enable or Disable Touchpad:
- Right-click on the touchpad driver and select "Enable" or "Disable" from the context menu.
4. Confirm Action:
- If prompted to confirm the Action, click "Yes" to proceed.
Troubleshooting Touchpad Issues
If you encounter any issues while enabling or disabling the touchpad on your Lenovo laptop, consider the following troubleshooting steps:
Update Drivers: Ensure that your touchpad drivers are up to date. You can download the latest drivers from the Lenovo support website or use Lenovo Vantage to update them automatically.
Check Hardware Switch: Some Lenovo laptops have a physical switch or button to enable or disable the touchpad. Refer to your laptop's user manual to locate this switch and ensure it is in the correct position.
Restart Your Laptop: A simple restart can sometimes resolve temporary touchpad issues.
Scan for Malware: Run a full system scan using reliable antivirus software to check for malware or potentially harmful programs that may be affecting your touchpad's functionality.
Contact Lenovo Support: Learn how to easily enable or disable the touchpad on your Lenovo laptop with our detailed instructions. Whether you're looking to enhance your productivity or troubleshoot touchpad issues, we've got you covered. For any further assistance, contact our dedicated Lenovo Laptop Service Center at +918929161841 or 8860481697, or visit our website www.lenovolaptopservicecentres.com. Our expert technicians also provide other services such as repairs and maintenance, ensuring your Lenovo laptop runs smoothly at all times.
Read more: Lenovo Laptop Touchpad Issue | Lenovo Laptop Screen Replacement
Conclusion
Ultimately, mastering how to enable or disable Touchpad in Lenovo laptop is a valuable skill that grants you greater control and customization over your device. Whether you prefer the precision of an external mouse or the convenience of a touchpad, knowing how to switch between these options empowers you to work and play more efficiently. You may easily adjust your laptop's touchpad settings and customize it to your liking using the techniques described in this article to fix any possible problems. Harness the full potential of your Lenovo laptop with ease and convenience!
FAQs (Frequently Asked Questions) about Enabling or Disabling Touchpad in Lenovo Laptops
1. Why would I want to disable the touchpad on my Lenovo laptop?
Disabling the touchpad can be useful when using an external mouse to prevent accidental cursor movements or when focusing on tasks that require precise control.
2. I followed the steps, but my touchpad is still not working. What should I do?
Try restarting your laptop and checking for any updates to your touchpad drivers. If the issue persists, contact Lenovo customer support for further assistance.
3. Is it possible to customize touchpad gestures and sensitivity on Lenovo laptops?
Yes, Lenovo laptops offer customization options for touchpad gestures, sensitivity, scrolling behavior, and more. You can adjust these settings in Windows or using Lenovo Vantage software.
4. Can I enable or disable the touchpad on my Lenovo laptop using third-party software?
While some third-party software may offer touchpad customization features, it's recommended to use official Lenovo software like Lenovo Vantage for optimal compatibility and support.
 Share
Share
 Tweet
Tweet
 Share
Share
 Share
Share
Recent Post
-

-

-

-

-

-

-

-

-
-

-

-

-

-

-

-

-

-

-

-

-

-

-

-

-

-

-

-

-

-

-

How to Save Money on Lenovo Laptop Repairs
13 Oct 2025
-

-

10 Common Issues Faced by Lenovo Laptop Users
04 Oct 2025
-
-

-

-

-

-

-

-

-

-

Lenovo Laptop Boot Loop Issue – How to Repair
12 Aug 2025
-

Lenovo Laptop Sound Not Working – Easy Fixes
07 Aug 2025
-
-

-

-
-

-

-

How to Factory Reset a Lenovo Laptop?
30 Jun 2025
-

-

-

-

-

-

-

-

Cannot Load Driver ENE.SYS? Try These 6 Fixes!
12 Dec 2024
-

-

-

-

-

-

-

-

-

-

-

-

-

-

-

How to Solve Lenovo Laptop Hanging Problem
26 Oct 2024
-

-

-

How to Restart Lenovo Laptop with Black Screen
22 Oct 2024
-

-

-

-

-

-

-

-

Lenovo Laptop Power Button on but no Display
02 Sep 2024
-

How to Fix Wi-Fi Not Showing on Windows 10/11
30 Aug 2024
-

Lenovo Laptop Touchpad Replacement Cost in India
28 Aug 2024
-

-

-

How to Unlock a Locked Lenovo Laptop Keyboard
12 Aug 2024
-

-
How to Boot Into Safe Mode On a Lenovo Laptop
31 Jul 2024
-

-

-

-

-

How to Check Lenovo Laptop Fan is Working or Not
09 Jul 2024
-

How to Fix Bluetooth Problem in Lenovo Laptop
05 Jul 2024
-

-

How to Install OS (Operating System) on Laptop
27 Jun 2024
-
How to Fix It When Windows 11 Won't Shut Down
21 Jun 2024
-

-

-

-

Lenovo E-41 25 Panel Replacement Cost in India
31 May 2024
-

How to Fix Stuck Keys on Lenovo Laptop Keyboard
30 May 2024
-

-

-

-

-

-
-

Lenovo Laptop Black Screen Issue on Windows 11
17 Apr 2024
-

-

How to Download Lenovo Vantage for Windows 11
15 Apr 2024
-

How to Get Lenovo Accidental Damage Protection
11 Apr 2024
-
-

-
-
Lenovo System Update Download For Windows 11
06 Apr 2024
-

-

-

-

Lenovo Laptop Security Issues in windows 11
04 Apr 2024
-
-

How to Check Battery Health in Lenovo Laptop
30 Mar 2024
-

-
-
-

-

-

-

-

How to Run Hardware Diagnostics on Lenovo Laptop
20 Dec 2023
-

How to find model number of lenovo laptop
18 Dec 2023
-

-
-

-
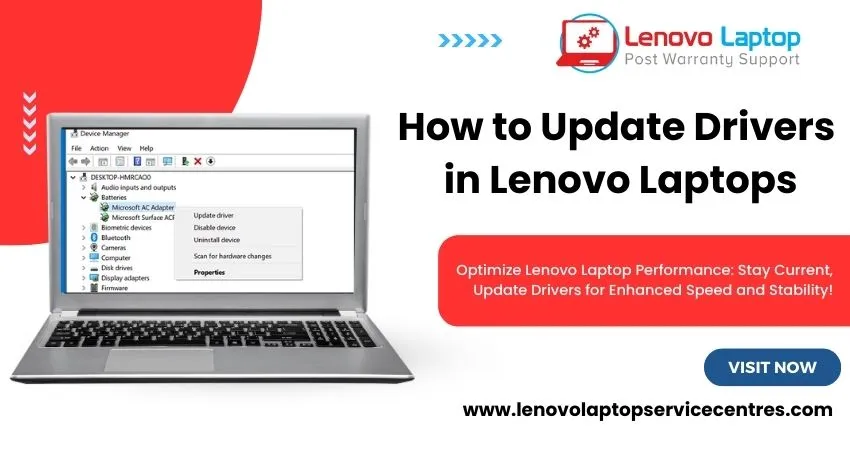
How to Update Drivers in Lenovo Laptops
02 Dec 2023
-

Why is my lenovo laptop making a buzzing noise
28 Nov 2023
-

-

-

-

-

Best Guide: Resolve Lenovo Laptop Touchpad Issue
11 Oct 2023
-
How to Troubleshoot Lenovo Laptop Battery Issues
16 Aug 2023
-

Lenovo Laptop Hinges Repair or Replacement Cost
09 Aug 2023
-

How to Find Lenovo Laptop Serial Number
08 Aug 2023
-

-

Lenovo Laptop SSD Upgradation Cost
18 Jul 2023
-

Lenovo Laptop Camera Replacement Cost
18 Jul 2023
-

-

Lenovo Laptop Battery Replacement Cost
13 Jul 2023
-

Lenovo Laptop Screen Replacement Cost
12 Jul 2023
-

Lenovo Laptop Keyboard Replacement Cost
12 Jul 2023
-

-

How to Fix Camera Issue in Lenovo Laptop
07 Jul 2023
-

How to Format Lenovo Laptop with USB
06 Jul 2023
-

How to Increase Battery Life on a Lenovo Laptop
21 Jun 2023
-

How to Fix White Screen on Lenovo Laptop
20 Jun 2023
-

Lenovo Laptop Motherboard Replacement Cost
19 Jun 2023
-

How do I stop my Lenovo laptop from overheating?
16 Jun 2023
-
-

-

-

-

-

-

-

-
-

-

-

-

-
-
-

-

What is Cost of Lenovo Laptop in India?
22 Sep 2022
-
Lenovo Laptop Problems Black Screen
21 Sep 2022
Looking For A Fast & Reliable Laptop Repair Service
We have professional technicians, fast turnaround times and affordable rates. Book Your Repair Job Today!
We specialize in all types of laptop services and provide reliable and quality door step service to our clients