Call Us: +91-7042640351, 9891868324
How to Format Lenovo Laptop with USB
By Admin / 06 Jul 2023
In the fast-paced world of technology, keeping our devices in top-notch condition is essential for optimal performance. If you're a Lenovo laptop user looking to give your device a fresh start, formatting it using a USB drive is a bright and efficient solution.This tutorial will follow you through the steps, assuring a trouble-free experience.
Disclaimer: Formatting your laptop will erase all data on the hard drive. Make sure to back up any important files or documents before proceeding with the formatting process.
Why Format Your Lenovo Laptop?
Before we delve into the steps, let's understand why formatting your Lenovo laptop might be necessary. Over time, accumulated clutter, malware, or other issues can affect your laptop's performance. Formatting allows you to clean the slate, eliminating these problems and giving your computer a fresh start.
Benefits of Formatting:
1. Improved Performance: Remove unnecessary files and applications that may slow down your laptop.
2. Remove Malware: Formatting helps eradicate any stubborn malware or viruses.
3. Fix System Errors: Solve persistent system errors that may hinder your laptop's functionality.
Preparing for the Format
1. Back Up Your Data: Before formatting, it's crucial to back up your important data. Use an external hard drive or cloud storage to ensure none of your valuable files are lost.
2. Charge Your Laptop: Ensure your laptop is sufficiently charged or connected to a power source to prevent any interruptions during the formatting process.
3. Gather the Necessary Tools: You'll need a USB drive with sufficient storage capacity and a reliable data transfer cable.
Step-by-Step Guide to Format Your Lenovo Laptop Using a USB Drive
Step 1: Create a Bootable USB Drive
1. Download the Necessary Software: You'll need software like Rufus or UNetbootin to create a bootable USB drive. Download and install the preferred software on a working computer.
2. Insert USB Drive: Plug your USB drive into the computer. Ensure there's no critical data on the drive; the formatting process will erase everything.
3. Open the Software: Launch the Rufus or UNetbootin software and select your USB drive from the list of available drives.
4. Load the ISO File: Download the official Windows ISO file from the Microsoft website and load it into the software. This makes your USB disk bootable.
5. Create Bootable USB: Click on the "Start" or "Create" button, depending on the software you're using. This process may take some time.
Step 2: Format the Lenovo Laptop Using a USB Drive
1. Insert the Bootable USB: Once the bootable USB is ready, please insert it into the Lenovo laptop that needs formatting.
2. Restart Your Laptop: Restart your Lenovo laptop and press the necessary key (usually F2 or F12) to enter the boot menu. Select the USB drive as the boot option.
3. Install Windows: To begin the Windows installation procedure, follow the directions on the screen. When prompted, choose the option to format the existing partitions.
4. Complete the Installation: Continue the Windows installation process, selecting language, time zone, and other preferences. Once done, your Lenovo laptop will be formatted, and the operating system will be reinstalled.
Step 3: Restore Backed-Up Data
1. Reconnect External Drive: After formatting, reconnect the external drive containing your backed-up data.
2. Transfer Files: Copy your files back onto your Lenovo laptop. Organize them into appropriate folders to keep your system organized.
Professional Lenovo Laptop Service
While formatting your Lenovo laptop using a USB drive is a task you can perform independently, there may be situations where professional assistance is required. If you encounter difficulties or if your laptop has hardware issues, seeking the expertise of a professional Lenovo laptop service is recommended.
Signs Your Laptop Needs Professional Attention:
- Persistent hardware problems
- Unusual noises
- Overheating issues
- Display problems
Read Also: How to Check Lenovo Warranty on Your Laptop in 3 Easy Steps
Benefits of Professional Service:
1. Expert Diagnosis: Professionals can accurately identify and address software and hardware issues.
2. Warranty Preservation: Service by authorized professionals helps preserve your laptop's warranty.
3. Timely Solutions: Professional services often provide quicker solutions, minimizing downtime.
In conclusion, formatting your Lenovo laptop with a USB drive is a straightforward process that can breathe new life into your device. However, it's crucial to follow the steps carefully and, when in doubt, seek professional Lenovo laptop service for a comprehensive solution. Combining DIY techniques with professional expertise ensures your Lenovo laptop performs at its best for years.
 Share
Share
 Tweet
Tweet
 Share
Share
 Share
Share
Recent Post
-
-
-
-

-
-

-
-
-
-
-
-
-
-
-
-

-
-

-
-
-
-
-
-
-
-
-
-
-
-
-
How to Save Money on Lenovo Laptop Repairs
13 Oct 2025
-
-
10 Common Issues Faced by Lenovo Laptop Users
04 Oct 2025
-
-
-

-
-
-
-
-
-
-
Lenovo Laptop Boot Loop Issue – How to Repair
12 Aug 2025
-

Lenovo Laptop Sound Not Working – Easy Fixes
07 Aug 2025
-
-
-
-
-
-
-
How to Factory Reset a Lenovo Laptop?
30 Jun 2025
-
-

-

-

-

-

-
-

Cannot Load Driver ENE.SYS? Try These 6 Fixes!
12 Dec 2024
-

-

-
-
-

-
-
-

-
-
-

-

-
-

-

How to Solve Lenovo Laptop Hanging Problem
26 Oct 2024
-

-

-

How to Restart Lenovo Laptop with Black Screen
22 Oct 2024
-
-

-
-

-
-
-
-
Lenovo Laptop Power Button on but no Display
02 Sep 2024
-

How to Fix Wi-Fi Not Showing on Windows 10/11
30 Aug 2024
-
Lenovo Laptop Touchpad Replacement Cost in India
28 Aug 2024
-

-
-

How to Unlock a Locked Lenovo Laptop Keyboard
12 Aug 2024
-

-
How to Boot Into Safe Mode On a Lenovo Laptop
31 Jul 2024
-

-
-

-

-

How to Check Lenovo Laptop Fan is Working or Not
09 Jul 2024
-

How to Fix Bluetooth Problem in Lenovo Laptop
05 Jul 2024
-

-
How to Install OS (Operating System) on Laptop
27 Jun 2024
-
How to Fix It When Windows 11 Won't Shut Down
21 Jun 2024
-
-
-
-

Lenovo E-41 25 Panel Replacement Cost in India
31 May 2024
-

How to Fix Stuck Keys on Lenovo Laptop Keyboard
30 May 2024
-
-

-
-
-
-
-
Lenovo Laptop Black Screen Issue on Windows 11
17 Apr 2024
-
-
How to Download Lenovo Vantage for Windows 11
15 Apr 2024
-
How to Get Lenovo Accidental Damage Protection
11 Apr 2024
-
-

-
-
Lenovo System Update Download For Windows 11
06 Apr 2024
-
-
-
-
Lenovo Laptop Security Issues in windows 11
04 Apr 2024
-
-

How to Check Battery Health in Lenovo Laptop
30 Mar 2024
-
-
-
-

-
-
-
-
How to Run Hardware Diagnostics on Lenovo Laptop
20 Dec 2023
-
How to find model number of lenovo laptop
18 Dec 2023
-
-
-
-
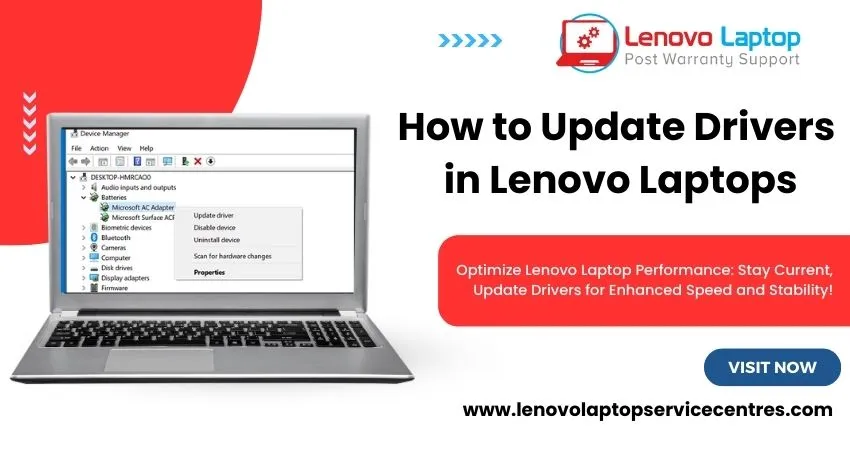
How to Update Drivers in Lenovo Laptops
02 Dec 2023
-

Why is my lenovo laptop making a buzzing noise
28 Nov 2023
-
-
-

-
-
Best Guide: Resolve Lenovo Laptop Touchpad Issue
11 Oct 2023
-
How to Troubleshoot Lenovo Laptop Battery Issues
16 Aug 2023
-
Lenovo Laptop Hinges Repair or Replacement Cost
09 Aug 2023
-
How to Find Lenovo Laptop Serial Number
08 Aug 2023
-
-
Lenovo Laptop SSD Upgradation Cost
18 Jul 2023
-

Lenovo Laptop Camera Replacement Cost
18 Jul 2023
-
-
Lenovo Laptop Battery Replacement Cost
13 Jul 2023
-
Lenovo Laptop Screen Replacement Cost
12 Jul 2023
-
Lenovo Laptop Keyboard Replacement Cost
12 Jul 2023
-
-
How to Fix Camera Issue in Lenovo Laptop
07 Jul 2023
-
How to Format Lenovo Laptop with USB
06 Jul 2023
-
How to Increase Battery Life on a Lenovo Laptop
21 Jun 2023
-
How to Fix White Screen on Lenovo Laptop
20 Jun 2023
-
Lenovo Laptop Motherboard Replacement Cost
19 Jun 2023
-
How do I stop my Lenovo laptop from overheating?
16 Jun 2023
-
-

-
-

-

-
-
-
-
-
-
-
-
-
-
-
-
What is Cost of Lenovo Laptop in India?
22 Sep 2022
-
Lenovo Laptop Problems Black Screen
21 Sep 2022
Looking For A Fast & Reliable Laptop Repair Service
We have professional technicians, fast turnaround times and affordable rates. Book Your Repair Job Today!
We specialize in all types of laptop services and provide reliable and quality door step service to our clients